Mold Remediation DIY: Safe & Effective Steps
Welcome to our comprehensive guide on mold remediation DIY techniques. In this article, we will provide you with step-by-step instructions to safely and effectively remove mold from your home. Whether you’re dealing with a small area of mold growth or a larger infestation, our guide will equip you with the knowledge and tools you need to handle it yourself.
Before we dive into the details, let’s briefly understand the dangers of mold and how it can impact your health and home. Mold growth can lead to respiratory issues, allergies, and even structural damage. It’s essential to address mold concerns promptly to maintain a clean and healthy living environment.
To successfully execute the mold remediation process, you need to assess the extent of the infestation and gather the necessary tools and supplies. We’ll guide you through these initial steps, ensuring you have a clear understanding of the problem and the tools you’ll need to address it.
Once you’re fully prepared, we’ll walk you through the step-by-step process of executing the mold remediation. From containing the affected area to removing the mold growth and cleaning contaminated surfaces, our instructions will help you carry out the process safely and effectively.
Finally, to prevent future mold growth, we’ll provide you with valuable tips and strategies. Maintaining proper ventilation, controlling moisture levels, and ensuring regular maintenance are crucial in keeping your home mold-free.
Key Takeaways:
- DIY mold removal is a cost-effective solution for addressing mold issues.
- Understanding the dangers of mold and its impact on health is crucial for effective remediation.
- Assessing the extent of the mold infestation is essential before starting the removal process.
- Gathering the necessary tools and supplies ensures a smooth remediation process.
- Executing the mold remediation process requires following step-by-step instructions and safety precautions.
Understanding Mold and Its Dangers
Before diving into the mold remediation process, it’s crucial to understand the basics of mold, its dangers, and how it can affect your health and home. Mold is a type of fungus that thrives in damp and humid environments, making it a common problem in homes with moisture issues.
Mold Removal at Home
Mold growth can lead to various health problems, including allergic reactions, respiratory issues, and irritation of the eyes, nose, and throat. Individuals with compromised immune systems or pre-existing respiratory conditions may be more susceptible to the effects of mold exposure.
“Mold can also cause structural damage to your home, compromising its integrity over time.”
In addition to the health risks, mold can also cause structural damage to your home, compromising its integrity over time. It can weaken walls, floors, and ceilings, and even lead to the development of rot and decay in organic materials.
DIY Mold Prevention
Preventing mold growth in your home is essential to safeguarding your health and preserving the integrity of your property. Here are some tips to help you prevent mold:
- Control humidity levels by using dehumidifiers or air conditioners.
- Fix any leaks or plumbing issues promptly.
- Ensure proper ventilation in areas prone to moisture, such as bathrooms and kitchens.
- Regularly clean and dry areas prone to dampness, such as basements and crawl spaces.
- Use mold-resistant products and materials when renovating or building.
By implementing these preventive measures, you can create an environment that is less conducive to mold growth and reduce the chances of experiencing an infestation.
To learn more about mold removal tips and DIY mold prevention, continue reading our comprehensive guide.
Assessing the Mold Infestation
Before beginning the mold remediation process, it’s crucial to conduct a thorough assessment of the mold infestation. This step allows you to determine the extent of the problem and develop an effective plan for mold removal. Here are the essential steps to assess the mold infestation:
- Inspect the affected areas: Carefully examine all areas where mold growth is visible or suspected. Check for signs of moisture, such as water stains or a musty odor.
- Identify the type of mold: It’s important to identify the specific type of mold present, as different types may require different remediation strategies. Consider hiring a professional mold inspector to perform mold testing for accurate identification.
- Determine the severity of the problem: Assess the size and scope of the mold infestation. Isolated, small areas of mold growth can often be addressed through DIY mold cleanup techniques. However, larger or extensive infestations may require professional mold remediation services.
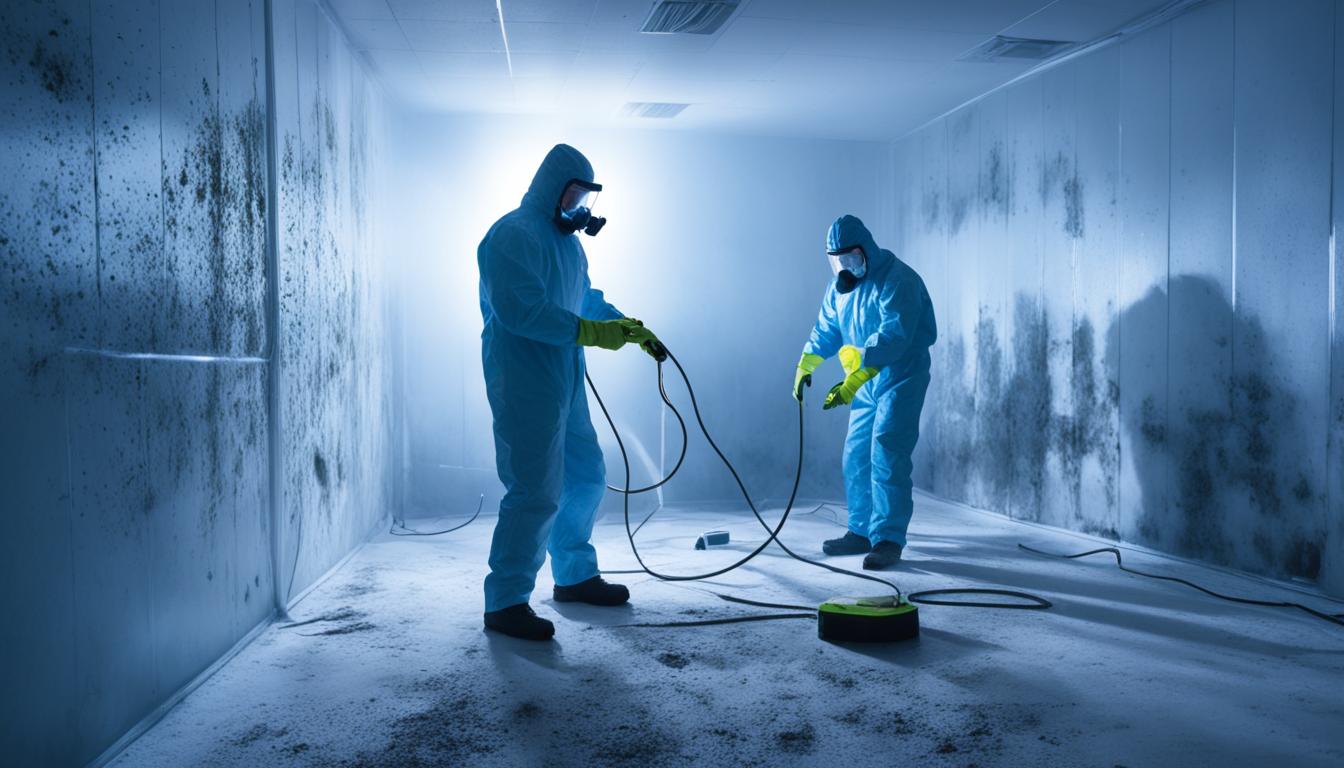
During the assessment process, it’s crucial to prioritize safety. Mold can release harmful spores into the air, leading to health problems. Take the following essential safety precautions:
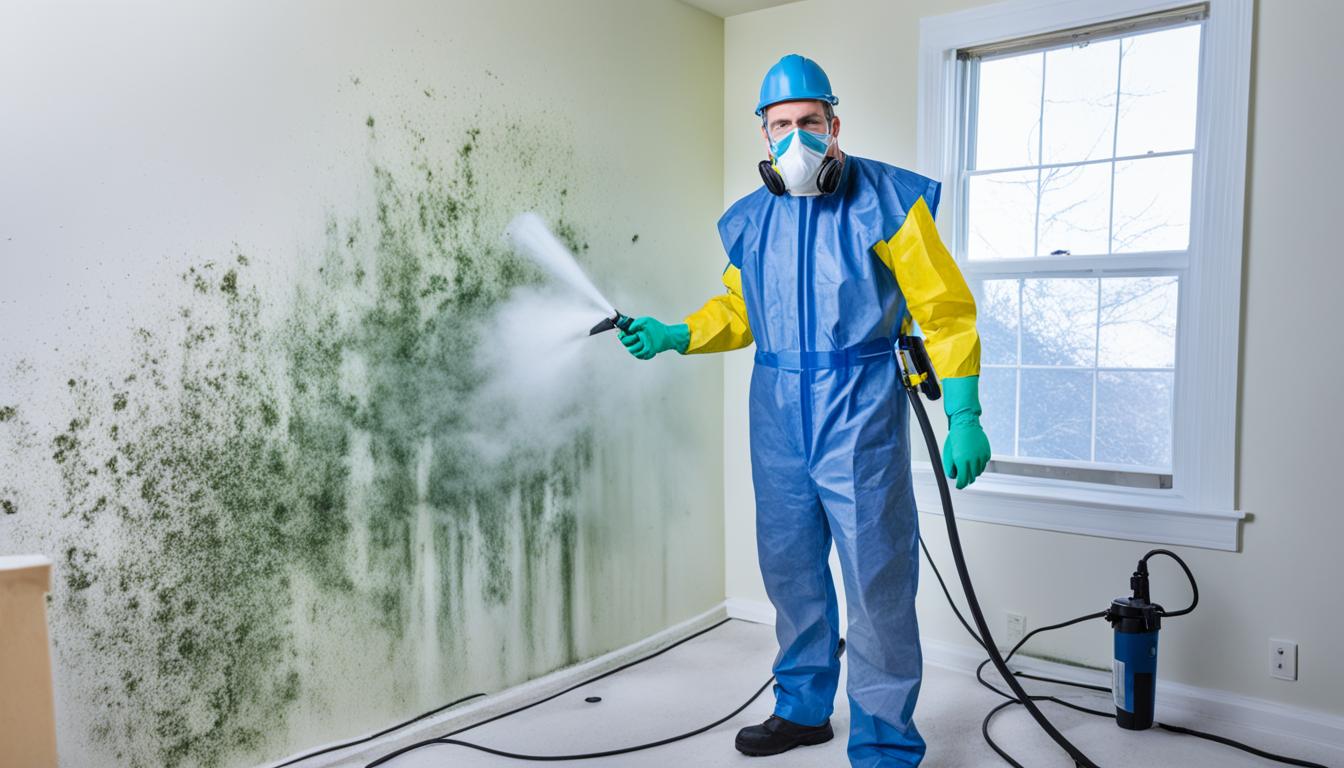
- Wear protective gear: Put on disposable gloves, safety goggles, and a respirator mask to protect yourself from mold spores.
- Ventilate the area: Open windows and use fans or dehumidifiers to increase airflow in the affected area.
- Contain the mold: Use plastic sheeting or tarps to isolate the mold-infested area and prevent spores from spreading to other parts of your home.
“Assessing the mold infestation is a critical first step in the mold remediation process. By thoroughly inspecting the affected areas, identifying the type of mold, and determining the severity of the problem, you can develop an effective plan for cleanup and ensure the safety of yourself and your home.”
Once you have completed the assessment and taken the necessary safety precautions, you will be ready to move on to the next step of gathering the necessary tools and supplies for mold removal.
Gathering the Necessary Tools and Supplies
Once you’ve assessed the mold situation, it’s time to gather the necessary tools and supplies for the remediation process. Having the right equipment and cleaning products is crucial to ensure effective mold removal. Below, we’ve compiled a detailed list of essential items you’ll need:
Protective Gear
- Safety goggles: to protect your eyes from mold spores and cleaning agents.
- N95 respirator mask: to filter out mold spores and prevent inhalation.
- Disposable gloves: to protect your hands from mold contamination and cleaning chemicals.
- Protective clothing: long sleeves, pants, and shoe covers to minimize contact with mold and prevent cross-contamination.
Cleaning Products
- Bleach: a powerful disinfectant effective in killing mold and preventing regrowth.
- Mold-specific cleaning agents: such as hydrogen peroxide or commercial mold removers.
- Heavy-duty cleaners: for scrubbing stubborn mold stains and residues.
- Vinegar: a natural alternative to chemical cleaners.
Equipment
- Scrub brushes: stiff-bristle brushes in various sizes to scrub mold off surfaces.
- HEPA vacuum cleaner: equipped with a high-efficiency particulate air filter to capture mold spores.
- Plastic sheeting: to create containment barriers and prevent mold spores from spreading.
- Disposable plastic bags: for safe disposal of contaminated materials.
- Air purifiers: with HEPA filters to improve air quality during and after remediation.
Remember, proper disposal of materials contaminated with mold is crucial to prevent further exposure. Seal all waste in plastic bags before disposing of them in outdoor garbage bins.
Having these tools and supplies ready will equip you with everything necessary to tackle mold remediation effectively. Once you have all the required items, you’ll be prepared to proceed with the next section, where we’ll guide you through executing the mold remediation process.

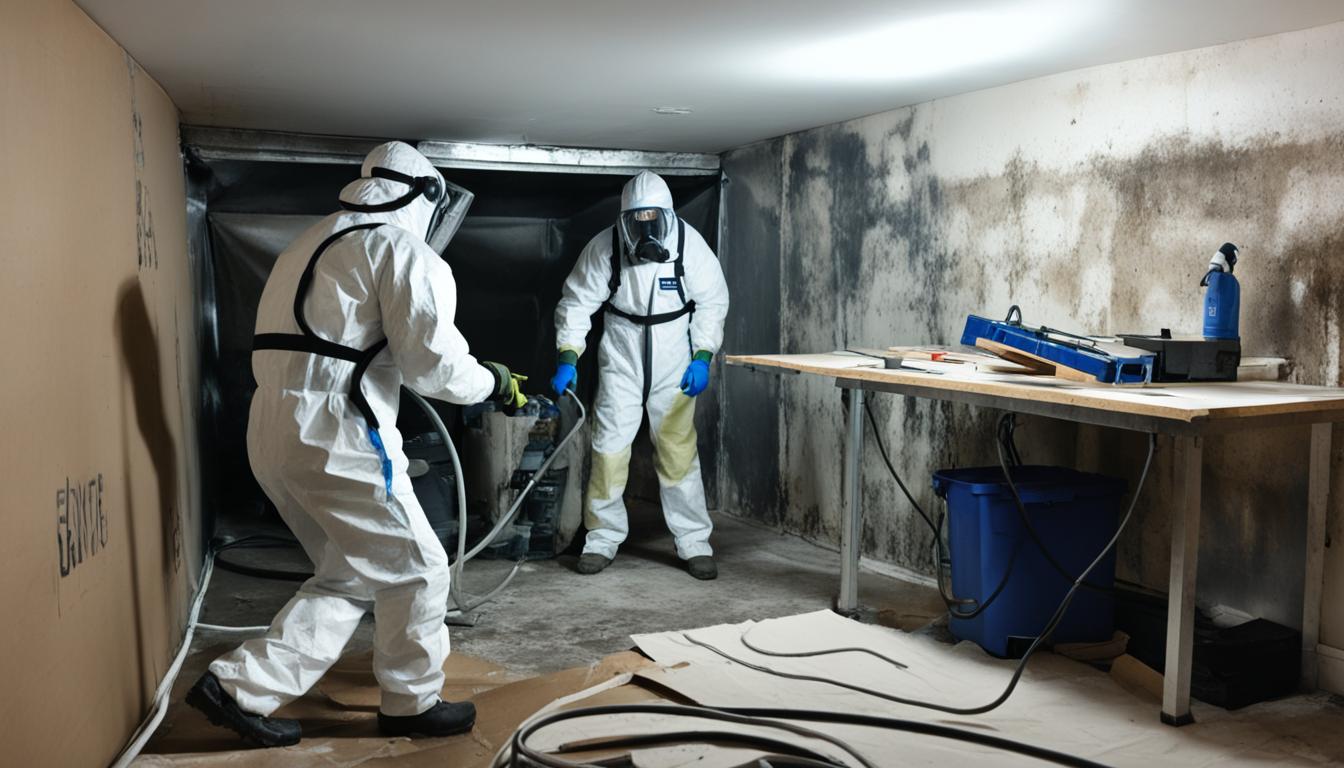
Executing the Mold Remediation Process
Now that you have assessed the extent of the mold infestation and gathered the necessary tools and supplies, it’s time to dive into the mold remediation process. This step-by-step guide will help you safely and effectively remove mold from your home using DIY mold removal techniques.
1. Contain the affected area
The first step in mold remediation is to contain the affected area to prevent the spread of mold spores. Seal off the area using plastic sheets and duct tape, ensuring that all windows, doors, and vents are tightly covered. This containment will help minimize the risk of cross-contamination during the removal process.
2. Wear protective gear
Before beginning the removal process, it’s crucial to protect yourself by wearing the appropriate protective gear. This includes gloves, goggles, and a respirator mask to prevent direct contact with mold spores and inhalation of airborne contaminants.
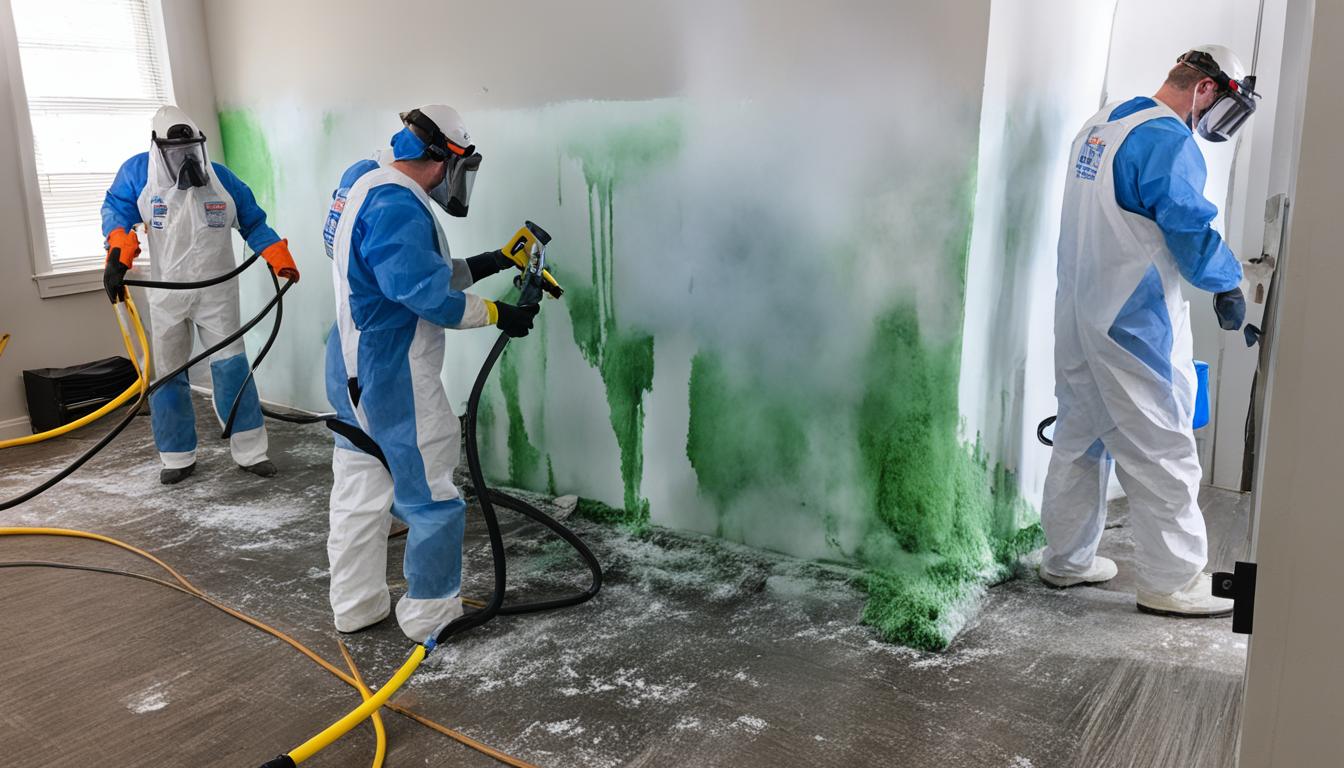
3. Remove mold growth
Using a mold removal solution or a mixture of water and detergent, carefully clean the mold-infested surfaces. Scrub gently with a brush to remove visible mold growth, ensuring thorough coverage. Be cautious not to create airborne mold spores during the cleaning process.
4. Dispose of contaminated materials
Any materials or items that cannot be effectively cleaned or remediated, such as porous materials or heavily contaminated surfaces, should be bagged and discarded as hazardous waste. Seal the bags tightly to prevent the release of mold spores.
5. Clean and dry the area
After removing the mold growth, clean the area again using a mold removal solution or a mixture of water and detergent. Ensure that all surfaces are thoroughly cleaned and dried. This step helps eliminate any remaining mold spores and prevents future mold growth.
6. Monitor and prevent
Once the remediation process is complete, it’s crucial to monitor the area periodically to ensure that mold does not return. Keep an eye out for any signs of moisture or mold growth, and promptly address any issues to prevent further infestation.
Remember, if you come across extensive or persistent mold infestation, it’s always recommended to consult a professional mold remediation service for assistance.

By following these mold remediation steps, you can effectively remove mold from your home and create a healthier living environment. However, always prioritize your safety and well-being throughout the process. If in doubt, reach out to professionals for expert assistance.
Preventing Future Mold Growth
Once you’ve successfully remediated the mold, it’s crucial to take preventive measures to avoid future growth. By implementing proper maintenance practices and controlling moisture in your home, you can significantly reduce the risk of mold returning. Here are some mold removal tips and DIY mold prevention strategies to keep your home mold-free:
- Keep Your Home Dry: Moisture is a breeding ground for mold. Regularly check for any signs of leaks or water damage in your home, especially in areas prone to moisture, such as bathrooms, basements, and attics. Fix any plumbing issues promptly and ensure proper ventilation to prevent excess moisture buildup.
- Maintain Proper Ventilation: Good airflow is essential in preventing mold growth. Use exhaust fans in bathrooms, kitchens, and laundry rooms to remove humid air. Keep windows open and use dehumidifiers in areas with high humidity levels.
- Control Indoor Humidity: Maintain indoor humidity levels below 50%. Use a hygrometer to monitor humidity and dehumidifiers if necessary. Empty and clean the water collection trays regularly to prevent mold growth.
- Monitor and Address Condensation: Condensation can form on windows, pipes, and walls, creating a damp environment conducive to mold growth. Wipe off condensation promptly and consider using insulation or double-glazed windows to reduce condensation buildup.
- Regularly Inspect and Clean: Conduct regular inspections of your home, paying attention to areas prone to mold growth, such as basements, crawl spaces, and bathrooms. Clean mold-prone surfaces using a solution of water and detergent. Avoid the use of bleach, as it may not effectively kill mold and can be harmful.
- Properly Maintain HVAC Systems: Regularly clean and maintain your heating, ventilation, and air conditioning (HVAC) systems. Change filters as recommended by the manufacturer to ensure proper airflow and minimize the spread of mold spores.
Remember: These mold remediation steps and prevention tips are meant for small-scale mold issues. If you’re dealing with a large or persistent mold problem, it’s advisable to seek professional assistance. Taking immediate action and implementing these preventive measures can help you maintain a mold-free and healthy home environment.
Conclusion
In conclusion, mastering mold remediation DIY techniques is a practical and cost-effective way to tackle mold issues in your home. By following the step-by-step mold removal techniques outlined in this guide, you can confidently take control of mold growth and create a clean and healthy living environment for you and your family.
Remember, safety should always be your top priority when dealing with mold. While DIY mold removal can be effective for smaller infestations, it’s crucial to consult professionals like Fix Mold Miami at 305-465-6653 for extensive or stubborn mold problems. Their experienced team specializes in mold assessments, prevention, and remediation, and can provide the expertise and tools necessary for thorough mold eradication.
By implementing the preventive measures discussed in this guide, such as practicing proper moisture control, regular maintenance, and vigilant monitoring, you can significantly reduce the risk of mold recurring in your home. Consistent attention to these preventive strategies will help you keep your living space mold-free and maintain a healthy indoor environment for years to come.
Don’t let mold take control of your home. With the knowledge and techniques shared in this guide, you can confidently address mold issues on your own, ensuring a safe and healthy living environment for you and your loved ones. Take the necessary steps to prevent and remove mold, and enjoy a clean, mold-free home that you can be proud of.