Expert Tips on Cutting Quarter Round Molding
When it comes to enhancing the aesthetics of your home, quarter round molding is a versatile and stylish option. Whether you’re renovating or embarking on a DIY project, cutting quarter round molding with precision is crucial for seamless installation. In this section, we will provide expert tips and techniques to help you achieve flawless cuts.
Key Takeaways:
- Proper measurement and marking are essential for accurate cuts.
- Hand saws offer a traditional approach but require skill for precision.
- Power tools like miter saws and oscillating tools provide efficiency and accuracy.
- Maintain safety by wearing protective gear and following safety precautions.
- Finishing and installation techniques are essential for a polished look.
By following these expert tips and using the right tools, you can confidently cut quarter round molding and achieve professional results. Let’s explore each technique in detail to ensure your quarter round molding project is a success.
Understanding Quarter Round Molding
Before we dive into the cutting techniques, it’s important to understand what quarter round molding is and the tools you’ll need for the job. Quarter round molding, also known as shoe molding or base shoe, is a type of trim used to cover gaps between the baseboard and the floor or between the baseboard and other surfaces. It is typically a quarter-circle in shape, with one flat side and one curved side.
The purpose of quarter round molding is to provide a finished and polished look to the edges of baseboards, especially in areas where the baseboards do not meet the floor or other surfaces perfectly. It also serves to protect the baseboards from damage and wear over time.
When it comes to cutting quarter round molding, having the right tools is essential for achieving clean and accurate cuts. Here are the best tools recommended for cutting quarter round:
- Miter saw: This power tool is ideal for making precise angled cuts, especially for corners and angles.
- Oscillating tool: A versatile and handheld power tool that can be fitted with a variety of blades for different cutting requirements. It is especially useful for cutting quarter round molding in tight or hard-to-reach areas.
- Hand saw: If you prefer a more traditional approach, a hand saw can still provide accurate cuts, although it may require more effort and skill.
- Combination square or measuring tape: These tools are essential for measuring and marking the quarter round molding accurately before making cuts.
- Coping saw: While not necessary for every cut, a coping saw can be useful for creating clean and seamless joints when cutting quarter round molding at inside corners.
By using the right tools and understanding the characteristics of quarter round molding, you can ensure precise and professional-looking cuts. In the next section, we’ll explore the techniques for measuring and marking the quarter round molding accurately.
Measuring and Marking the Quarter Round
Accurate measurements and markings are crucial when cutting quarter round molding. Taking the time to measure correctly and mark the molding ensures precise cuts and seamless corners. In this section, we’ll share expert techniques for measuring and marking quarter round molding, including tips for cutting corners seamlessly.
Measuring Quarter Round Molding
Before you start cutting, it’s important to measure the length of the quarter round accurately. You can use a tape measure or ruler to measure the distance along the wall where the quarter round will be installed. Ensure the measurements are precise, accounting for any corners or gaps in the molding. Take note of the measurements to ensure you cut the correct lengths.
Marking the Quarter Round
Once you have the measurements, use a pencil or marker to mark the cutting points on the quarter round molding. Start by marking the length measurements on the top of the molding, ensuring you’re consistent with the markings. You can also use a square or angle template to mark any corners or angles accurately. These markings will act as guides when you begin cutting the molding.
Expert Tip: To achieve seamless corners, use a miter saw or coping saw to cut the quarter round at a 45-degree angle for inside corners. For outside corners, miter the molding at a 45-degree angle in the opposite direction. This technique ensures a perfect fit and eliminates any visible gaps.
Cutting Corners Seamlessly
Cutting corners can be a bit challenging when working with quarter round molding. To achieve seamless corner cuts, there are a few techniques you can try:
- Coping Saw Technique: Instead of cutting perfect 45-degree angles, use a coping saw to create complementary shapes on the molding’s end. This technique allows the molding to fit snugly against each other, resulting in a seamless corner.
- Miter Saw Technique: If you prefer a simpler approach, you can use a miter saw to make precise 45-degree angle cuts. Just ensure you cut in the correct direction for inside and outside corners.
Remember to measure and mark each piece of molding individually when cutting corners. This ensures a perfect fit and eliminates any discrepancies caused by irregular walls or corners. Take your time and double-check your measurements and markings before making any cuts.
| Tools | Pros | Cons |
|---|---|---|
| Miter Saw | Allows precise 45-degree angle cuts | Can be expensive for occasional use |
| Coping Saw | Creates complementary shapes for seamless corners | Requires more time and skill |
Hand Saw for Precision Cuts
If you prefer a traditional and manual approach, using a hand saw for cutting quarter round molding can be an excellent choice. Hand saws offer precision and control, allowing you to achieve perfect cuts for seamless installations. Here, we’ll provide you with tips and hacks to ensure your quarter round cutting experience with a hand saw is efficient and accurate.
“A hand saw is a versatile tool that can deliver precise cuts when used correctly. By following these quarter round cutting hacks, you can achieve professional results using a hand saw.”
Before you begin cutting, it’s essential to have the proper equipment:
- A high-quality, sharp hand saw with fine teeth to ensure clean cuts.
- A miter box or a similar device to hold the quarter round molding securely in place during cutting.
- A pencil or marker for marking your cutting lines accurately.
- Safety goggles to protect your eyes from any potential debris.
Now, let’s dive into some quarter round cutting hacks:
- Measure accurately: Take precise measurements of the area where the quarter round molding will be installed. Measure twice to ensure accuracy before marking your cutting lines.
- Mark your cutting lines: Use a pencil or marker to mark the cutting lines on the quarter round molding. Make sure the lines are visible and easily distinguishable.
- Secure the molding: Place the quarter round molding securely in the miter box or a similar device. Ensure it is held firmly to prevent any movement during cutting.
- Start with a light cut: Begin your cut with a light stroke to create a groove. This will help guide the saw and prevent any wandering.
- Use smooth and fluid strokes: Once the groove is established, use smooth and fluid strokes to cut through the quarter round molding. Apply gentle pressure and let the saw do the work.
- Check your progress: Periodically check your cutting progress to ensure you’re following the marked lines accurately.

To give you a better idea of the quarter round cutting process using a hand saw, here’s a table summarizing the pros and cons of this method:
| Method | Pros | Cons |
|---|---|---|
| Hand Saw |
|
|
Using a hand saw for cutting quarter round molding can be an excellent choice, especially if you enjoy a hands-on approach. By following these quarter round cutting hacks and utilizing the right techniques, you can achieve precise cuts that seamlessly fit your project. Remember to prioritize safety by wearing protective goggles and using secure cutting methods. With practice, you’ll become proficient in using a hand saw for cutting quarter round molding with accuracy and efficiency.
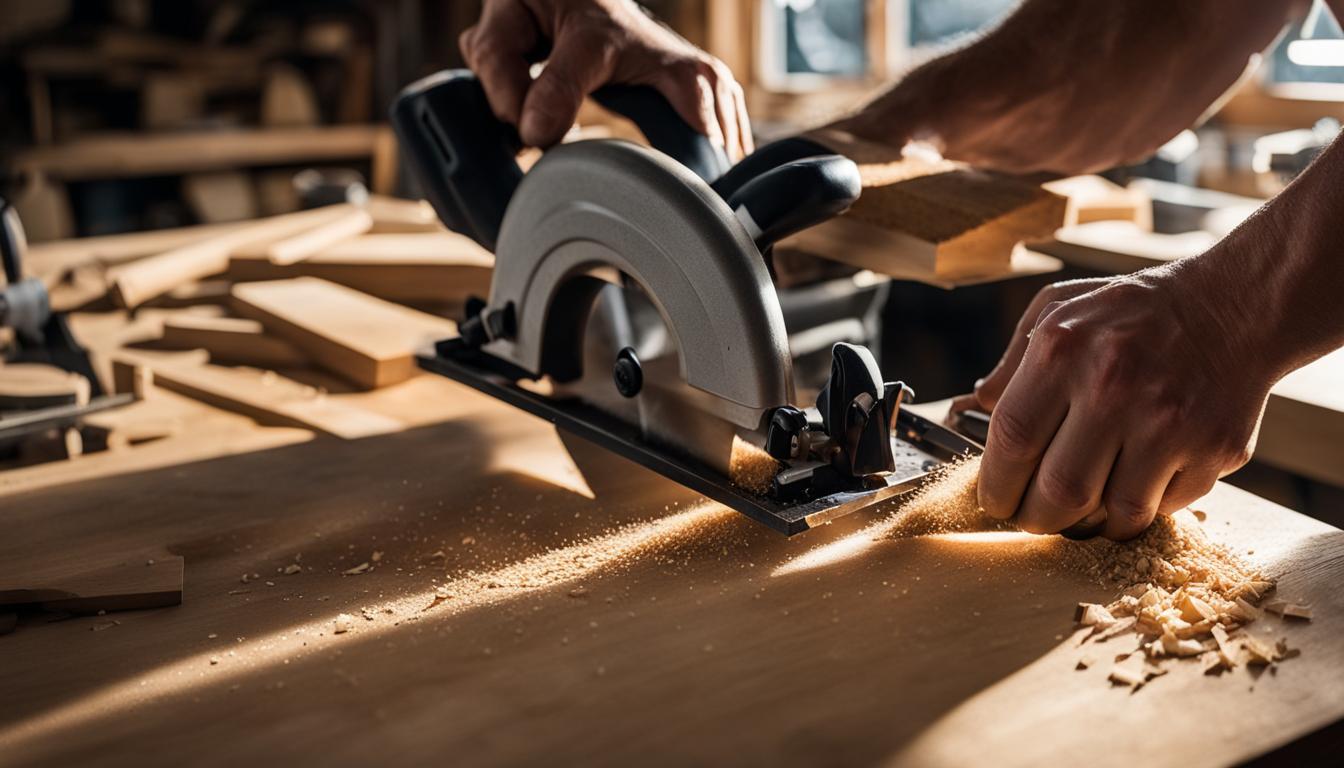
Power Tools for Efficiency
When it comes to cutting quarter round angles with efficiency and precision, power tools are the go-to choice for many professionals and DIY enthusiasts. These tools offer speed, accuracy, and convenience, making the cutting process much easier.
Two commonly used power tools for cutting quarter round angles are miter saws and oscillating tools. Let’s take a closer look at how each of these tools can help you achieve professional results.
Miter Saws
A miter saw is a versatile tool that allows you to make precise angled cuts in various materials, including quarter round molding. With its rotating blade and adjustable angles, you can easily cut quarter round angles with accuracy.
Here are some tips for using a miter saw to cut quarter round angles:
- Ensure the quarter round molding is securely clamped to the miter saw fence to prevent any movement during the cutting process.
- Adjust the miter saw’s angle setting to match the desired angle for the corner.
- Make a practice cut on a scrap piece of quarter round to verify the accuracy of the angle setting before cutting the actual molding.
- Slowly lower the saw blade onto the quarter round and make a smooth, steady cut, keeping your fingers clear of the blade.
Oscillating Tools
An oscillating tool, also known as a multi-tool, is a versatile and compact tool that can handle a variety of cutting tasks. It features a rapid back-and-forth motion, allowing for precise cutting in tight spaces and intricate angles.
Here are some tips for using an oscillating tool to cut quarter round angles:
- Choose a cutting blade specifically designed for cutting wood to ensure clean and accurate cuts.
- Mark the angle on the quarter round and align the oscillating tool’s blade with the marked line.
- Slowly and steadily guide the oscillating tool along the marked line, applying gentle pressure to make the cut.
Remember to always wear appropriate safety gear, such as safety glasses and gloves, when using power tools. Additionally, read and follow the manufacturer’s instructions for each power tool to ensure safe and proper usage.
With the right power tools and proper techniques, you can easily cut quarter round angles with efficiency and precision. Whether you choose a miter saw or an oscillating tool, always practice on scrap pieces before cutting the actual quarter round molding to ensure accurate results.
Safety Precautions
Safety should always be a top priority when working with any tools or equipment. Here are some important safety precautions to follow while cutting quarter round molding to ensure a safe and accident-free experience:
- Use Personal Protective Equipment (PPE): Before starting any cutting work, make sure to wear the necessary PPE, such as safety goggles and gloves, to protect your eyes and hands from debris and accidents.
- Maintain a Clean and Organized Work Area: Clear any clutter or obstacles that could cause accidents. Keep your work area clean and organized to avoid tripping hazards.
- Ensure Proper Ventilation: If you are cutting quarter round molding indoors, make sure there is adequate ventilation to prevent the buildup of dust and fumes. Open windows or use a ventilation system to maintain good air quality.
- Secure the Workpiece: Use clamps or other securing methods to hold the quarter round molding firmly in place while cutting. This will prevent any movement or slipping that could lead to inaccurate cuts or injuries.
- Follow Tool Safety Guidelines: Familiarize yourself with the safety guidelines for the specific tools you are using, such as hand saws or power tools. Use them correctly and in accordance with the manufacturer’s instructions to minimize the risk of accidents.
- Take Breaks: Cutting quarter round molding can be a tiring task. Take regular breaks to rest and refresh yourself, especially if you start feeling fatigued. This will help you stay alert and focused.
Remember, accidents can happen even with the utmost caution. Prioritize your safety and be mindful of potential hazards throughout the cutting process. A few extra minutes spent on safety measures can save you from serious accidents or injuries.
By following these safety precautions, you can ensure a secure and accident-free experience while cutting quarter round molding.
Additional Safety Resources
If you would like more detailed information on safety measures while handling tools or cutting materials, here are some additional resources you may find helpful:
- Occupational Safety and Health Administration (OSHA): Visit the official OSHA website for comprehensive safety guidelines and resources specific to your region.
- Manufacturer’s Safety Manuals: Consult the safety manuals provided by the manufacturers of the tools and equipment you are using. These manuals often contain detailed instructions on safe operation and maintenance.
- Local Community Resources: Reach out to your local community or trade organizations that promote safety in construction or woodworking. They may offer workshops, training sessions, or safety certifications relevant to your work.
By combining expert tips, proper techniques, and safety precautions, you can confidently embark on your quarter round cutting project while protecting yourself and others from potential harm.
Troubleshooting Tips
Despite meticulous planning, cutting quarter round molding can sometimes present unexpected challenges. In this section, we’ll provide troubleshooting tips to help you overcome common issues and ensure a smooth cutting process.
Problem: Splintered Cuts
If you’re experiencing splintering or rough edges while cutting quarter round molding, try the following solutions:
- Switch to a finer-toothed saw blade to reduce tearing.
- Apply masking tape along the cutline to minimize splintering.
- Ensure the quarter round molding is securely clamped before cutting to minimize vibrations.
Problem: Uneven Cuts
If your cuts are turning out uneven, causing fitting issues, consider the following remedies:
- Double-check your measurements and ensure accurate marking before cutting.
- Use a miter saw or a shooting board to achieve precise and square cuts.
- Take your time and cut slowly, allowing the saw blade to do the work.
Problem: Difficult Corner Cuts
Corner cuts can be challenging, but with these tips, you can achieve seamless quarter round molding corners:
- Make practice cuts on scrap pieces to refine your technique before cutting the actual molding.
- Consider using a coping saw or a miter saw with an adjustable angle feature to make accurate corner cuts.
- File or sand the edges of the cut to ensure a snug fit against adjacent pieces.

Remember, troubleshooting is a normal part of the cutting process, and with patience and practice, you’ll overcome any challenges. Stay tuned for the next section, where we’ll guide you through the finishing and installation of your quarter round molding.
| Troubleshooting Tips | Solutions |
|---|---|
| Splintered Cuts |
|
| Uneven Cuts |
|
| Difficult Corner Cuts |
|
Finishing and Installation
Once you have successfully cut the quarter round molding, it’s time to focus on the finishing touches and proper installation. This section will guide you through the key steps to achieve a polished and professional result.
1. Sanding
Before installing the quarter round molding, it’s important to sand the edges and surfaces to ensure a smooth finish. Use fine-grit sandpaper to gently sand any rough areas or imperfections. This will create a clean and even surface for painting or staining.
2. Priming and Painting/Staining
Depending on the desired look, you can either paint or stain the quarter round molding. If you choose to paint, apply a coat of primer first to enhance adhesion and prevent the wood grain from showing through. Once the primer is dry, apply your chosen paint color evenly using a brush or roller. If staining, apply a wood stain evenly using a brush or cloth, following the manufacturer’s instructions. Allow the paint or stain to dry completely before proceeding.
3. Cutting Angles and Joining Pieces
When installing quarter round molding, you may encounter corners or angles that require precise cutting. Measure the angles carefully and use a miter saw or coping saw to make accurate cuts. To create seamless corner joints, cut one piece at a 45-degree angle and another piece at the complementary angle for a perfect fit. Secure the pieces together using wood glue or finishing nails.
4. Attaching the Molding
Apply a thin bead of construction adhesive to the back of the quarter round molding, focusing on the edges and corners. Press the molding firmly against the wall or baseboard, ensuring it aligns with the desired height and position. To secure the molding further, use finishing nails or a nail gun. Countersink the nails slightly below the surface and fill the holes with wood filler for a seamless finish.
5. Caulking and Touch-ups
To achieve a professional look, caulk any gaps between the molding and the wall or baseboard. Use a high-quality paintable caulk and a caulk gun to apply a smooth and even line. Once the caulk is dry, touch up any paint or stain as needed to ensure a consistent and flawless appearance.
| Key Steps for Finishing and Installation | |
|---|---|
| 1. Sanding | Gently sand the quarter round molding to ensure a smooth finish. |
| 2. Priming and Painting/Staining | Apply primer and then paint or stain the molding as desired. |
| 3. Cutting Angles and Joining Pieces | Make precise cuts to create seamless corner joints. |
| 4. Attaching the Molding | Secure the molding to the wall using adhesive and nails. |
| 5. Caulking and Touch-ups | Caulk any gaps and touch up the paint or stain for a professional finish. |
Maintaining Quarter Round Molding
Once you have successfully cut and installed the quarter round molding, it’s important to maintain its appearance and longevity. Proper care and maintenance will ensure that your quarter round molding retains its beauty for years to come. Here are some essential tips:
- Clean regularly: Dust and dirt can accumulate on the surface of the quarter round molding. Use a soft, dry cloth or a vacuum cleaner with a brush attachment to gently remove the dust. Avoid using harsh chemicals or abrasive cleaners that may damage the finish.
- Avoid moisture: Moisture can cause the wood or other materials used in the molding to warp or deteriorate. Ensure that the area around the molding is well-ventilated and keep it dry. Wipe away any spills or moisture immediately.
- Inspect for damage: Regularly inspect the quarter round molding for any signs of damage, such as cracks, chips, or loose pieces. Repair or replace any damaged sections promptly to prevent further deterioration.
- Protect from UV exposure: If the quarter round molding is exposed to direct sunlight, it may fade or discolor over time. Consider using blinds, curtains, or window film to protect the molding from UV rays.
- Apply a protective finish: Applying a protective finish to the quarter round molding can help enhance its durability and resistance to wear. Consult with a professional or follow the manufacturer’s recommendations for the appropriate finish.
By following these maintenance tips, you can ensure that your quarter round molding remains in optimal condition, adding to the overall aesthetic appeal of your space. Remember, proper maintenance not only preserves the beauty of the molding but also extends its lifespan.
Expert Tip:
“Regular cleaning and inspection are key to maintaining the beauty and longevity of quarter round molding. By staying proactive and addressing any issues promptly, you can enjoy the elegant look and functionality of your molding for years to come.”
Conclusion
In conclusion, cutting quarter round molding requires precision and the right techniques. By following the expert tips and using the recommended tools, such as those from Fix Mold Miami, you can enhance your DIY project with seamless quarter round cuts. Remember to always prioritize safety and take the necessary precautions, consulting with professionals like those at Fix Mold Miami for mold assessment and prevention. With practice, you’ll become proficient in cutting quarter round molding and achieve professional results.