Discover the Secrets of stepping stone Mold
Welcome to our guide on stepping stone mold! If you’re looking to add charm and beauty to your garden, stepping stone pathways are the perfect solution. These versatile molds allow you to create unique and personalized designs that will enhance the aesthetics of any outdoor space.
In this article, we will uncover the secrets of stepping stone mold and show you how to unleash your creativity to craft stunning pathways that will leave your guests in awe. Whether you’re a novice or an experienced DIY enthusiast, our step-by-step instructions and expert tips will empower you to create beautiful stepping stones effortlessly.
Are you ready to embark on a journey of artistic expression and transform your garden? Let’s dive into the wonderful world of stepping stone molds and unlock their potential!
Key Takeaways:
- Stepping stone molds allow you to create unique and personalized pathways in your garden.
- With the right mold, you can enhance the aesthetics of your outdoor space and add charm to your garden.
- Our guide will provide you with step-by-step instructions and expert tips to craft stunning stepping stones effortlessly.
- Unleash your creativity and express yourself through the design and decorative elements of your stepping stones.
- Get ready to transform your garden into a captivating oasis with beautiful stepping stone pathways.
Choosing the Right Stepping Stone Mold
When it comes to creating durable and visually appealing pathways in your garden, choosing the right stepping stone mold is key. With so many options available, it can be overwhelming to make a decision. But don’t worry, we’re here to help!
In this section, we will guide you through the process of selecting the perfect mold for your garden. By considering factors such as size, design, and material, you can ensure that your stepping stones not only withstand the test of time but also enhance the beauty of your outdoor space.
Size Matters
First and foremost, consider the size of your pathway and the area in which you plan to place your stepping stones. Measure the dimensions carefully to determine the appropriate size of the mold you’ll need. Keep in mind that smaller molds may be ideal for tighter spaces or intricate designs, while larger ones can create a bolder and more impactful look.
Design Choices
The design of your stepping stone mold plays a significant role in the overall aesthetic of your garden. Consider the style and theme you want to achieve. Are you going for a classic and elegant look, or do you prefer a more modern and unconventional design? Look for molds with patterns, textures, and shapes that align with your vision. Don’t be afraid to get creative and experiment!
Material Matters
Another crucial factor to consider is the material of the mold. Stepping stone molds are typically made of plastic, rubber, or silicone. Each material has its own advantages and suitability for different environments. Plastic molds are durable and affordable, while rubber and silicone molds offer flexibility and easy release of the finished stones. Choose a material that best suits your needs and preferences.
Remember, selecting the right stepping stone mold is like choosing the perfect pair of shoes for your garden. It should not only fit well but also complement your style!
To help you visualize the different factors to consider when choosing a stepping stone mold, take a look at the table below:
| Factor | Description | Options |
|---|---|---|
| Size | Determines the dimensions of the stepping stone mold. | Small, medium, large, custom |
| Design | Defines the patterns, textures, and shapes of the stepping stone mold. | Classic, modern, geometric, floral |
| Material | Influences the durability and release of the stepping stone from the mold. | Plastic, rubber, silicone |
Now that you have a better understanding of how to choose the right stepping stone mold, you’re ready to embark on your creative journey. Let your imagination run wild and bring your garden pathways to life!

In the next section, we will dive deeper into the process of crafting stunning stepping stones using your chosen mold. Get ready to get your hands dirty and create beautiful masterpieces!
Crafting Stunning Stepping Stones
Now that you have your stepping stone mold, it’s time to unleash your creativity and craft stunning stepping stones. With these step-by-step instructions, you’ll be able to create beautiful and unique pathways in your garden.
Mixing the Concrete
The first step in crafting your stepping stones is mixing the concrete. Follow these simple steps:
- Start by wearing protective gloves and a mask to ensure your safety.
- In a large container, mix the concrete according to the manufacturer’s instructions. Add water gradually while stirring to achieve a smooth and workable consistency.
- Depending on the size of your mold, you may need to mix multiple batches of concrete.
Adding Decorative Elements
Once you have your concrete mixture ready, it’s time to add some decorative elements to make your stepping stones truly unique. Here are some ideas:
- Embedded stones or glass: Press colorful stones or glass beads onto the surface of the wet concrete to create a beautiful mosaic effect.
- Handprints or footprints: Make lasting memories by imprinting your handprints or footprints onto the stepping stones. Ensure the concrete is firm enough to hold the imprint.
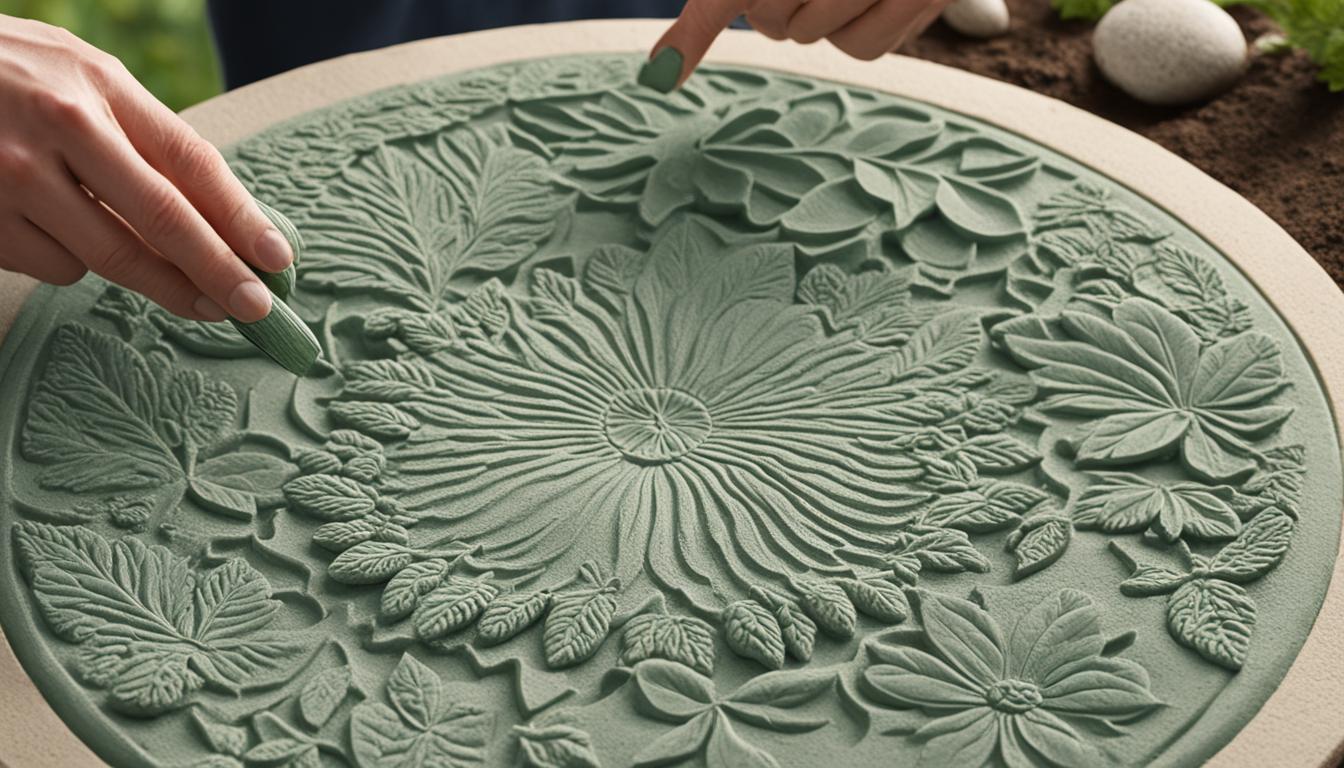
- Pressed leaves or flowers: Arrange fresh leaves or flowers on the wet concrete and gently press them down to create natural designs.
- Personalized designs: Use stencils or templates to create personalized designs or write inspiring messages on the surface of the stepping stones.
“The true beauty of crafting stepping stones lies in the freedom to express your creativity and make them truly unique.”
Drying and Finishing
After adding your desired decorative elements, allow the stepping stones to dry completely. The drying time may vary depending on the weather conditions, but it typically takes 24 to 48 hours.
Once the stepping stones are fully dry, carefully remove them from the mold. Place them in your garden, creating a beautiful path or decorative feature. Remember to leave space between each stepping stone for a natural and inviting look.
Finally, protect your stepping stones from the elements by applying a sealant or outdoor varnish. This will help maintain their beauty and durability over time.

With these simple steps, you can unleash your creativity and make stunning stepping stones for your garden. Each stone will be a unique reflection of your style and personality. Enjoy the process and take pride in your beautifully crafted pathway!
Conclusion
Creating beautiful and durable pathways in your garden has never been easier with the help of stepping stone molds. Throughout this article, we have explored the secrets of stepping stone molds, guiding you on the journey to unleashing your creativity.
By selecting the right stepping stone mold, considering factors such as size, design, and material, you can ensure that your pathways not only enhance the aesthetics of your garden but also withstand the test of time. The versatility of these molds allows you to experiment with different patterns and textures, adding a unique touch to your outdoor space.
With our step-by-step instructions on crafting stunning stepping stones, you have all the knowledge you need to embark on this creative endeavor. From mixing the concrete to adding decorative elements, the process is both enjoyable and rewarding. Let your creativity shine as you design and personalize each stepping stone, making your garden truly your own.