Creative Resin Mold Projects for DIY Crafters
Are you a DIY enthusiast looking for a new and exciting crafting medium? Look no further than resin molds! Resin molds offer endless possibilities for creating unique and personalized pieces for your home or as gifts. Whether you’re a seasoned crafter or just starting out, working with resin molds is sure to ignite your creativity and produce stunning results.
Key Takeaways:
- Resin molds are a versatile medium for DIY crafters.
- They allow for the creation of personalized pieces for home decor and gifts.
- Working with resin molds offers limitless creative possibilities.
- Resin molds come in various types, such as silicone, epoxy, and clear molds.
- A resin mold kit and supplies are essential for getting started with resin crafting.
Getting Started with Resin Molds
Before embarking on your resin mold projects, it’s essential to gather the necessary supplies and invest in a high-quality resin mold kit. Equipping yourself with the right tools and materials will set you up for success and ensure seamless crafting experiences. In this section, we will guide you through the essential resin mold supplies and the elements of a comprehensive resin mold kit.
The Essential Resin Mold Supplies
When it comes to resin crafting, having the right supplies is crucial. Below is a list of must-have resin mold supplies that will enable you to bring your creative visions to life:
- Resin: Choose a high-quality resin that suits your project requirements, such as epoxy resin or clear resin.
- Mold Release Agent: This product ensures easy removal of your cured resin from the mold and prevents sticking.
- Mold Material: Silicone molds are the most popular choice due to their flexibility and durability. However, depending on your project, you may also explore other materials like plastic or metal molds.
- Measuring Tools: Accurate measurements are crucial in resin casting. Use graduated cups or precision scales to measure resin and hardener in the correct proportions.
- Mixing Tools: Silicone spatulas or stir sticks are ideal for thoroughly mixing resin and hardener while minimizing air bubbles.
- Protective Equipment: Safety should always be a priority when working with resin. Wear gloves, safety glasses, and a respirator mask to protect yourself from any potential hazards.
- Work Surface: Choose a flat, non-porous surface that you can dedicate to your resin crafting projects. A silicone mat or a disposable table cover can help protect your work area.
The Resin Mold Kit
Investing in a resin mold kit can simplify your resin crafting journey by providing you with a comprehensive set of tools and materials all in one package. The contents of a resin mold kit may vary, but here is a general overview of what you can expect:
- A variety of silicone molds in different shapes and sizes to spark your creativity.
- Resin and hardener bottles of appropriate sizes for multiple projects.
- A mold release agent for easy demolding.
- Measuring cups or syringes with clear markings for accurate resin mixing.
- Mixing tools such as stir sticks or spatulas.
- Protective equipment like gloves and safety goggles.
By investing in a resin mold kit, you can save time and ensure that you have everything you need to kickstart your resin crafting adventure.
Now that you understand the importance of resin mold supplies and resin mold kits, you’re ready to begin your resin crafting journey. In the next section, we will explore the different types of resin molds available and their unique characteristics. Stay tuned!
Exploring Different Types of Resin Molds
Resin molds open up a world of creativity for DIY crafters, allowing them to bring their unique visions to life. When it comes to resin molds, there are various types to choose from, each offering its own set of features and possibilities. Understanding the characteristics of different resin molds can help you select the right one for your projects and achieve the desired results.
Silicone Molds
Silicone molds are a popular choice among resin crafters due to their flexibility and durability. These molds can withstand high temperatures, making them suitable for working with epoxy resins that require heat curing. Silicone molds are also known for their ease of use and ability to capture intricate details, ensuring that every mold comes out with precision.
Epoxy Resin Molds
Epoxy resin molds are specifically designed for working with epoxy resin, a type of resin that provides a glossy, clear finish. These molds are often made from high-quality materials such as silicone or polyurethane, allowing for easy release of the cured resin. Epoxy resin molds come in various shapes and sizes, catering to a wide range of crafting projects.
Clear Resin Molds
If you want to create transparent or translucent resin pieces, clear resin molds are the perfect choice. These molds are typically made from transparent materials such as polypropylene or polycarbonate, allowing you to see the resin as it cures. Clear resin molds are commonly used for creating jewelry, decorative objects, and other projects that require a see-through effect.
Resin molds come in various types, including silicone molds, epoxy resin molds, and clear resin molds. Each type offers unique characteristics that can enhance your resin crafting experience and help you achieve the desired results.
Now that you have a better understanding of the different types of resin molds available, you can confidently choose the one that suits your project needs. Whether you’re looking to capture intricate details, achieve a glossy finish, or create transparent pieces, there’s a resin mold out there for you. Experiment with different types and unleash your creativity!
| Resin Mold Type | Features | Common Uses |
|---|---|---|
| Silicone molds | Flexible, durable, captures intricate details | Jewelry, figurines, coasters |
| Epoxy resin molds | Glossy finish, easy release of cured resin | Decorative trays, keychains, photo frames |
| Clear resin molds | Transparent or translucent finish | Jewelry, decorative objects |
Step-by-Step Guide to Resin Casting
Resin casting is a fundamental technique in the world of resin molds. It allows you to bring your creative visions to life by transforming liquid resin into solid, intricate pieces. To help you achieve beautiful and professional results every time, we’ve put together a step-by-step guide on resin casting.
Step 1: Prepare Your Workstation
Before you begin casting resin, it’s crucial to set up a clean and organized workstation. Clear away any clutter, ensure good ventilation, and cover your work surface with wax paper or a silicone mat to protect it from spills. Gather all the necessary materials, including your resin casting mold, resin mixture, measuring cups, stirring sticks, and any desired additives such as color pigments or glitters.
Step 2: Measure and Mix the Resin
Accurate measurements are key to successful resin casting. Follow the instructions provided with your resin mixture to determine the proper ratio of resin and hardener. Use separate measuring cups for each component and pour the specified amounts into them. It’s essential to mix the resin thoroughly for at least 2-3 minutes, ensuring the resin and hardener are completely combined.
Step 3: Add Color and Additives (Optional)
If you want to add color or other additives to your resin, this is the time to do it. Drop in a few color pigments or glitters into the resin mixture and gently stir until evenly distributed. Remember that a little goes a long way, so start with a small amount and gradually add more if desired. Avoid over-mixing to prevent air bubbles from forming.
Step 4: Pour the Resin into the Mold
With your resin mixture ready, it’s time to pour it into your chosen resin casting mold. Slowly pour the resin into the mold cavity, starting from one side and working your way across. To minimize the formation of air bubbles, pour the resin slowly and at a consistent pace.
Step 5: Remove Air Bubbles
After pouring the resin, you may notice some air bubbles rising to the surface. To remove them, gently tap the side of the mold with a stirring stick or use a heat gun or torch on low heat to lightly pass over the surface of the resin. This will help the air bubbles rise and pop. Be careful not to apply too much heat or hold the heat source too close to the resin, as it may cause overheating or distortion.
Step 6: Cure the Resin
Allow the resin to cure according to the manufacturer’s instructions. This typically involves letting it sit undisturbed for 24-48 hours in a dust-free and temperature-controlled environment. Avoid touching or moving the mold during this time to ensure a smooth and even curing process.
Step 7: Demold Your Casting
Once the resin has fully cured, it’s time to demold your casting. Gently flex or twist the mold to release the resin piece. If needed, you can use a release agent, such as mold release spray or a thin layer of petroleum jelly, on the mold surface before pouring the resin to make the demolding process easier.
And there you have it – a comprehensive step-by-step guide to resin casting! With practice and experimentation, you’ll soon be creating exquisite resin mold creations that showcase your artistic flair.
Remember to always follow proper safety precautions when working with resin, including wearing gloves and working in a well-ventilated area.

Resin Mold Projects for Home Décor
When it comes to upgrading your home décor, resin mold projects are a creative and unique way to add personalized touches. From stunning coasters to decorative trays and personalized jewelry dishes, resin molds offer endless possibilities for transforming your living space. Let’s explore some inspiring ideas that will help you create pieces that reflect your individual style.
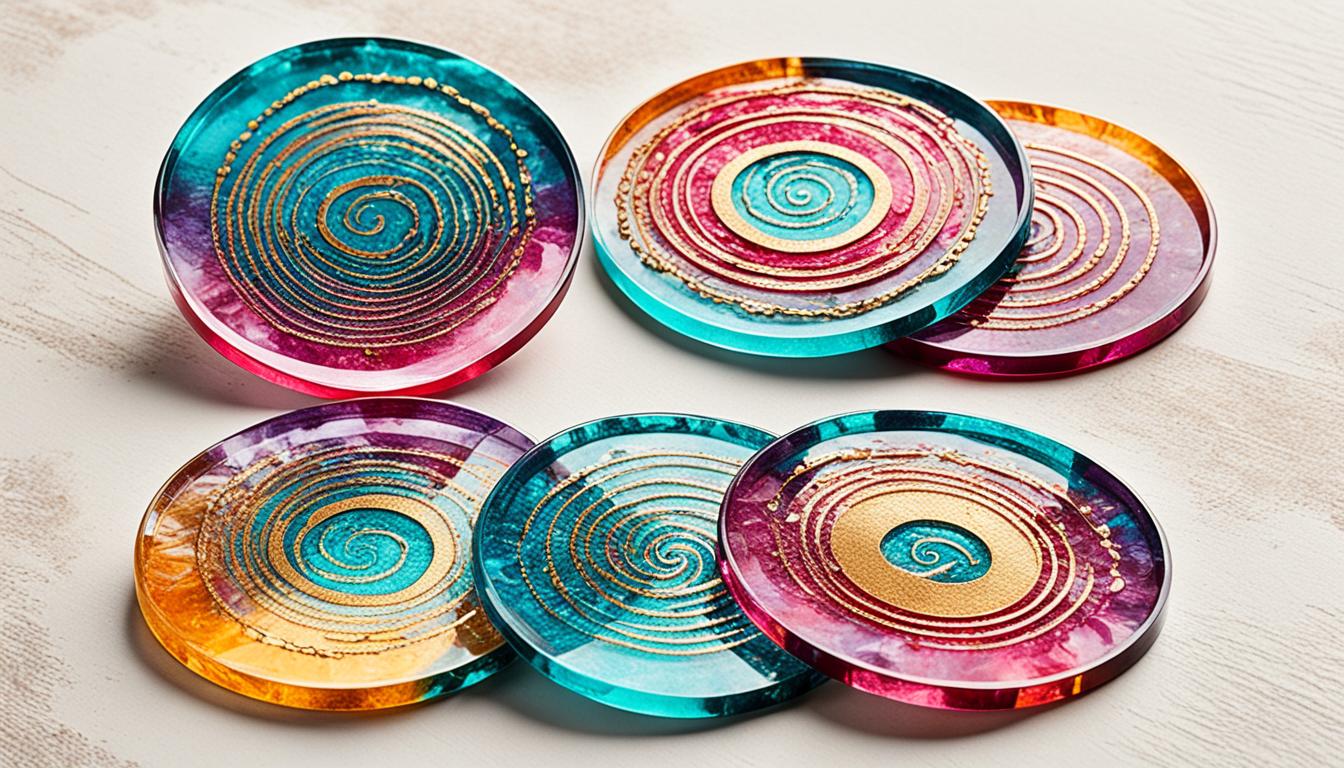
Unique Coasters
Elevate your coffee table or dining area with a set of one-of-a-kind resin coasters. Using a silicone mold, you can experiment with different colors and patterns to create captivating designs. The transparent nature of resin allows for beautiful light play, making your coasters both functional and aesthetically pleasing.
Decorative Trays
Resin mold decorative trays can serve as eye-catching centerpieces or elegant catch-alls for your keys and jewelry. By incorporating various pigments, glitters, or even dried flowers into your resin mixture, you can customize your tray to match your home’s color scheme and create a unique visual impact.
Personalized Jewelry Dishes
Add a touch of sophistication to your bathroom or vanity with a resin mold jewelry dish. Crafted with love, these dishes can hold your most treasured accessories while adding a personalized and artistic flair to your space. Choose your favorite colors and shapes to create a stunning piece that truly resonates with your style.
Resin mold projects offer a unique opportunity to infuse your home with personalized, handcrafted pieces that reflect your individuality. From coasters and trays to jewelry dishes, the possibilities are endless. Let your creativity run wild and transform your home décor with resin molds.
Unlock your artistic potential and explore the captivating world of resin mold projects. With a little creativity and the right materials, you can create beautiful, custom pieces that breathe new life into your home. Let your imagination guide you as you experiment with colors, textures, and designs, and watch as your DIY resin molds for crafts become stunning additions to your home décor.

Resin Mold Projects for Gifts
Handmade gifts always hold a special meaning, and resin mold projects make for memorable presents. Whether it’s for a birthday, anniversary, or any other occasion, creating personalized gifts using resin molds allows you to showcase your creativity and thoughtfulness. In this section, we will provide ideas and instructions for crafting unique and beautiful gifts that your loved ones will cherish.
Customized Keychains
Keychains are practical and versatile gifts that everyone can appreciate. With resin molds, you can easily create custom keychains that reflect the recipient’s personality or interests. Here’s a step-by-step guide to making personalized keychains:
- Select a resin mold design that fits the style you want to achieve for the keychain.
- Gather your materials: resin, color pigments, keychain hardware, and any additional embellishments you’d like to include.
- Prepare the resin according to the manufacturer’s instructions, and add the desired color pigments to achieve your desired effect.
- Pour the mixed resin into the mold and let it cure for the recommended time.
- Once the resin is cured, remove it from the mold and attach the keychain hardware.
- Personalize the keychain by adding initials, names, or small charms using additional resin or other materials.
- Allow the keychain to fully cure before gifting it.
With this simple process, you can create personalized keychains that are not only practical but also an expression of your thoughtfulness.
Photo Frames
Photo frames make wonderful gifts that allow your loved ones to display their cherished memories. By using resin molds, you can add a unique touch to traditional photo frames. Follow these steps to create stunning resin mold photo frames:
- Choose a resin mold in the shape and size that fits your photo frame design.
- Prepare the resin and mix in any desired color pigments.
- Pour the resin into the mold, filling it partially.
- Place your photo in the partially filled mold, ensuring it is centered and aligned.
- Pour the remaining resin into the mold to cover the photo completely.
- Allow the resin to cure according to the manufacturer’s instructions.
- Once the resin is fully cured, remove it from the mold and attach it to a plain photo frame, ensuring it is secure.
By incorporating resin molds into your photo frames, you can create one-of-a-kind pieces that beautifully showcase precious memories.
Other Beautiful Gifts
The possibilities for resin mold gifts are endless. Here are some additional ideas to inspire your creativity:
- Resin mold coasters with personalized designs or embedded objects.
- Resin mold jewelry dishes with delicate patterns or custom engravings.
- Resin mold bookmarks with vibrant colors and unique shapes.
Experiment with different resin mold designs, color combinations, and embellishments to craft unforgettable gifts that are sure to impress. Remember to follow the manufacturer’s instructions for resin curing times and safety precautions.
| Gift Idea | Description |
|---|---|
| Customized Keychains | Create personalized keychains using resin molds, incorporating initials, names, or small charms. |
| Photo Frames | Add a unique touch to traditional photo frames by embedding resin molds with photos. |
| Coasters | Design resin mold coasters with personalized patterns or embedded objects. |
| Jewelry Dishes | Create resin mold jewelry dishes with delicate patterns or custom engravings. |
| Bookmarks | Make resin mold bookmarks with vibrant colors and unique shapes. |
Tips and Tricks for Working with Resin Molds
Working with resin molds can be an exciting and rewarding experience, but it also requires some specialized knowledge and techniques for achieving professional-looking results. In this section, we’ll share valuable tips and tricks that will help you elevate your resin mold projects to the next level.
1. Choose the Right Resin Mold for Your Project
Resin molds come in various shapes and sizes, each suited for different types of crafts. When selecting a mold, consider the specific design or shape you want to achieve. Whether it’s a delicate pendant or a sturdy coaster, selecting the right mold is crucial for ensuring successful outcomes.
2. Prepare Your Workspace
Before starting your resin mold project, make sure to set up a clean and well-ventilated workspace. Resin can be messy, so covering your work area with a disposable tablecloth or plastic sheet can help protect surfaces. Additionally, wear gloves and a mask to protect yourself from potential irritants.
3. Measure and Mix Resin Properly
Accurate measurements are essential when working with resin. Follow the manufacturer’s instructions to ensure the right resin-to-hardener ratio. Use measuring cups or syringes to precisely measure the components, and mix them thoroughly according to the recommended mixing time. Properly mixed resin will result in a strong and durable final product.
4. Minimize Bubbles
Bubbles can be an unwelcome sight in resin mold projects, but there are several ways to minimize their appearance. One effective technique is to gently heat the mixed resin before pouring it into the mold. You can use a heat gun or a kitchen torch to remove any bubbles that may have formed during the mixing process. Additionally, consider using a silicone mold release spray or tapping the mold on a hard surface to release trapped air bubbles.
5. Incorporate Inclusions
Add a touch of uniqueness to your resin mold projects by incorporating various inclusions. These can include dried flowers, glitter, or small decorative items. Place the inclusions in the mold before pouring the resin and use a toothpick or craft stick to position them precisely. This will create stunning visual effects in your final piece.
6. Demolding with Care
Once your resin has fully cured, it’s time to demold your creation. Take your time and be gentle when removing the piece from the mold to avoid any damage. If you’re encountering difficulty in releasing the resin, place the mold in the freezer for a short while, then flex and press on the mold to loosen it.
Remember, practice makes perfect when working with resin molds. Don’t get discouraged if your first attempts don’t turn out exactly as planned. Keep experimenting, learning from your mistakes, and refining your techniques.
By following these tips and tricks, you’ll be well-equipped to create stunning resin mold projects with confidence and skill. Now, let’s take a look at some inspiring examples of resin mold projects for home décor and gifts in the following sections.
| Tips and Tricks | Benefits |
|---|---|
| Choose the Right Resin Mold for Your Project | Ensures accurate design replication |
| Prepare Your Workspace | Provides a clean and safe working environment |
| Measure and Mix Resin Properly | Creates strong and durable finished products |
| Minimize Bubbles | Results in a smooth and professional appearance |
| Incorporate Inclusions | Adds unique and personalized touches to your creations |
| Demolding with Care | Preserves the integrity of the finished piece |
Conclusion
In conclusion, resin mold projects offer a world of creativity and endless crafting possibilities. Whether you’re a seasoned DIY enthusiast or just starting out, working with resin molds will enable you to make unique, personalized pieces that will impress both yourself and others.
From stunning home décor items like coasters, decorative trays, and personalized jewelry dishes to memorable gifts such as customized keychains and photo frames, resin mold projects allow you to unleash your creativity and create pieces that reflect your individual style.
Don’t hesitate to dive into the exciting world of resin mold crafting. With a little practice and the right supplies, you’ll soon be creating professional-looking results that will amaze everyone. And if you have any concerns about mold assessments, prevention, or remediation, reach out to Fix Mold Miami at 305-465-6653 for the best service in Florida.
FAQ
What is a resin mold?
A resin mold is a silicone or epoxy mold used to cast resin into various shapes and forms. It allows crafters to create unique, customized pieces such as jewelry, home decor items, and more.
Why should I use a resin mold?
Using a resin mold provides the ability to create intricate and detailed designs that may be challenging to achieve freehand. It ensures consistent results and allows for easy replication of your creations.
Can I make my own resin mold?
Yes, it is possible to create your own resin molds using silicone molds or by building a mold with epoxy resin or other materials. However, it’s often more convenient to purchase pre-made molds that are specifically designed for resin casting.
What type of resin molds are available?
There are various types of resin molds available, including silicone molds, epoxy resin molds, and clear resin molds. Each type has its own unique features and benefits, which can enhance the outcome of your projects.
How do I use a resin mold?
To use a resin mold, you will first need to prepare your resin mixture according to the manufacturer’s instructions. Then, carefully pour the resin into the mold, making sure to eliminate any air bubbles. Allow the resin to cure and then demold the finished piece.
Can resin molds be used for other crafting materials?
While resin molds are primarily designed for use with resin, they can also be used for other materials such as epoxy clay, polymer clay, and other moldable substances. However, it’s important to clean the molds thoroughly before switching materials to avoid cross-contamination.
How can I avoid air bubbles in my resin molds?
To prevent air bubbles from forming in your resin molds, it’s important to mix the resin thoroughly and slowly pour it into the mold. You can also use a heat gun or a torch to carefully remove any surface bubbles that may appear before the resin sets.
How do I care for and clean my resin molds?
After using your resin molds, clean them thoroughly with warm, soapy water and a soft brush. Avoid using abrasive materials or harsh chemicals as they can damage the mold. Store the molds in a cool, dry place away from direct sunlight to prevent warping or discoloration.
Can resin molds be reused?
Yes, most resin molds are reusable. After demolding your piece, simply clean the mold and it will be ready for use again. However, over time, resin molds may wear out or lose their flexibility, so it’s a good idea to have a few backup molds on hand.