Repair Tips: How to Fix a Resin Mold Effectively
Resin molds are a great addition to any DIY enthusiast’s toolkit. They allow for creativity and flexibility in design, but they can also be prone to damage over time. If you’re dealing with a cracked or chipped resin mold, you may be wondering how to fix it. In this section, we’ll provide you with essential repair tips and techniques to help you effectively repair your resin mold.
Key takeaways:
- With the right tools and materials, you can repair your resin mold effectively.
- It’s important to properly assess the damage before starting any repairs.
- Preventive measures can help you maintain the longevity of your resin molds.
- Consider professional mold repair services for complex problems.
- Advanced techniques can help you tackle any repair challenge.
Understanding Resin Mold Problems
Resin molds are widely used in various industries, including jewelry-making, sculpture, and manufacturing. While they are durable and long-lasting, they are not immune to damage. Before initiating the repair process, it is essential to pinpoint the common problems that can occur with resin molds.
Common Resin Mold Problems
Surface Imperfections: Oftentimes, resin molds can have surface imperfections or pits due to air bubbles caught inside the resin during the casting process. These imperfections may cause the mold to produce imperfect replicas. Additionally, over time, the mold’s surface might become scratched, making it harder for the resin to release from the mold.
Structural Damage: Sometimes, resin molds can suffer structural damage, such as cracks or chips. These types of damages can lead to an imperfect cast or even a complete mold failure, rendering it unusable. This type of damage can happen due to a variety of reasons such as excess heat, chemical exposure, and physical impact.
Inaccurate Dimensions: In some cases, resin molds may not make replicas that match the desired dimensions due to a lack of precision in the casting process or the mold’s design.
Resin Mold Troubleshooting
Before rushing into the repair process, it is essential to identify the root cause of the problem. Through proper troubleshooting, you can diagnose the issue accurately, and take the necessary steps to fix it. Here are some key steps to follow while troubleshooting:
- Inspect the resin mold for any visible damage.
- Examine the cast replicas to identify the issue.
- Follow the recommended curing process for your type of resin and review any instructions from the manufacturer.
- Check the environmental conditions, such as temperature and humidity, in the resin mold’s storage area, as an inappropriate environment can cause various issues such as warping or cracking.
- Review the casting process to ensure that the problems are not due to issues in the casting process.
By thoroughly understanding common resin mold problems and implementing proper troubleshooting procedures, you can diagnose the issue efficiently and fix it adequately.
Assessing the Damage
Before you begin the repair process, it’s crucial to inspect your resin mold and assess the extent of the damage. Cracks, chips, or other deformities can compromise the mold’s structure, resulting in poor quality casts and, in severe cases, permanent damage.
To ensure that the repair process is effective, start by examining the mold under good lighting conditions and check for any signs of damage. Look for cracks or chips in the mold’s surface or any deformations that may require reshaping. Note any damage found in preparation for the necessary repairs to follow.
Tip: If you’re having trouble identifying any damage, try wiping the surface with a clean, dry cloth, which can help reveal any imperfections or chips more clearly.
At this stage, it’s essential to make a record of the damage you’ve found and document it for reference during the repair process. Taking before-and-after photos allows for a side-by-side comparison and serves as a reminder of the work done to restore the mold to its original condition.
Gathering the Necessary Tools and Materials
Before you begin repairing your resin mold, it’s crucial to have all the necessary tools and materials at hand. Here’s a list of items you’ll likely need:
| Tools | Materials |
|---|---|
|
|
Having all the necessary tools and materials will ensure that your repair job is not interrupted and that you can achieve professional-level results with ease.
Note: Depending on the extent of the damage and the mold’s material, you may need additional tools or specialized materials.
Now that you have all the required tools and materials, the next step is to prepare your resin mold for repair.
Preparing the Resin Mold
Proper preparation is crucial for a successful resin mold repair. Before beginning the repair process, follow these step-by-step instructions to prepare the mold:
- Clean the mold: Use a soft-bristled brush and mild soap to clean the resin mold, removing dirt and debris that can interfere with the repair.
- Remove any debris: Inspect the mold for any debris, such as sawdust or sanding residue, that can contaminate the repair. Use a lint-free cloth to remove any debris.
- Ensure a smooth surface: Sand the damaged area of the mold with a fine-grit sandpaper until the surface is smooth and even. This will help the repair material adhere properly and create a seamless finish.
Note: If the resin mold is not thoroughly cleaned and sanded, the repair material may not bond effectively and cause future problems.
By properly preparing the resin mold, you can ensure a successful repair and restore the mold to its original condition.
Filling Cracks and Chips
Cracks and chips are common issues that occur in resin molds. However, there are different techniques that can be used to fill these imperfections. One method involves using epoxy resin, while the other uses resin putty.
When filling cracks with epoxy resin, first mix a small amount of resin and hardener together. Then, apply the mixture directly to the crack using a brush or a toothpick. Be sure to overfill the crack slightly to ensure complete coverage. If necessary, apply additional layers until the crack is filled.
Similarly, when using resin putty, prepare a small amount of putty and apply it to the crack. Press the putty into the crack and mold it into the desired shape. Then, let the putty cure according to the manufacturer’s instructions.
Instructions for Filling Cracks with Epoxy Resin:
- Mix a small amount of epoxy resin and hardener together
- Apply the mixture to the crack using a brush or toothpick
- Overfill the crack slightly to ensure complete coverage
- Apply additional layers until the crack is filled, if necessary
Instructions for Filling Cracks with Resin Putty:
- Prepare a small amount of resin putty according to the instructions on the package
- Apply the putty to the crack and mold it into the desired shape
- Let the putty cure according to the manufacturer’s instructions
Whichever method you choose, once the crack or chip is filled, allow it to cure completely before sanding and smoothing the surface. For additional tips on sanding and smoothing the surface, refer to Section 7.

Sanding and Smoothing the Surface
After filling the cracks and chips, it’s time to sand and smooth the surface of the resin mold to achieve a perfect finish. Proper sanding techniques are essential for successful resin mold restoration and fixing cracked resin molds.
First, start by using a coarse sandpaper with a grit between 80 and 120 to remove any unevenness on the surface. Lightly sand the surface in circular motions to avoid creating new scratches. Remove any excess residue using a clean cloth or brush. Repeat this process until the surface becomes even and uniform.
Afterward, switch to a finer sandpaper with a grit of 220 to 320 to refine the surface further. You can also use a sanding sponge with a fine grit to ensure a smooth and glossy finish. Make sure to remove any dust or debris using a clean cloth before moving on to the next step.
For extra smoothness, you can wet sand the surface with a liquid lubricant. Use 600 to 1200 grit sandpaper and water or rubbing alcohol to wet the surface while sanding. This process helps to reduce the risk of scratches, resulting in a more polished finish.
Remember to wear gloves and a dust mask during the sanding process to avoid inhaling harmful residues and particles that may affect your health. Also, ensure the surface is completely dry before applying any further coatings for resin mold repair.
Repairing Structural Damage
Resin molds are prone to structural damage such as warping, bending, or distortion, which can affect their functionality and performance. To ensure complete restoration of your resin mold, it’s crucial to address any structural damage before proceeding with the repair process.
One technique for addressing structural damage is reshaping the mold to restore its original form. This requires a delicate touch and careful attention to detail. Start by heating the mold gently using a heat gun or hairdryer to soften the resin. Then, use shaping tools to reshape the mold, ensuring it’s even and symmetrical.
Another technique is reinforcing the mold by adding additional layers of resin or fiberglass. This technique requires more expertise and should only be attempted if you’re comfortable working with these materials. Start by applying a layer of resin or fiberglass over the damaged area, then allow it to cure for the recommended time. Repeat this process until the mold is fully reinforced and structurally sound.
Regardless of the technique you choose, it’s important to take your time and work carefully to avoid causing further damage to the mold. Remember to also inspect the mold thoroughly for any remaining imperfections before proceeding to the next step in the repair process.
Tips for Repairing Structural Damage:
- Gently heat the mold before reshaping it to avoid cracking or breaking the resin
- Wear protective gloves when working with resin or fiberglass to avoid skin irritation or injury
- Allow each layer of resin or fiberglass to cure fully before adding another layer
“Restoring a resin mold requires attention to detail and expertise. Addressing any structural damage is essential before proceeding with the repair process.”
Applying a Protective Finish
After repairing your resin mold, it’s crucial to apply a protective finish to ensure durability and resistance to future damage. There are different options available:
- Sealing with epoxy resin: This is a highly effective option that provides a waterproof barrier while also enhancing the mold’s appearance. Following the epoxy resin manufacturer’s instructions, carefully apply a thin layer of epoxy resin using a brush to cover the entire surface of your mold. Allow the epoxy resin to dry for 24-48 hours in a dust-free environment.
- Using a clear spray lacquer: This option is a fast and easy alternative to epoxy resin. Apply the clear spray lacquer in a well-ventilated area, following the manufacturer’s instructions. Allow the mold to dry for several hours before handling it.
Both options will protect your mold against harsh environmental conditions, such as UV exposure or high humidity levels. Ensure that the protective finish you choose is suitable for your specific type of resin mold and the conditions it will be exposed to.
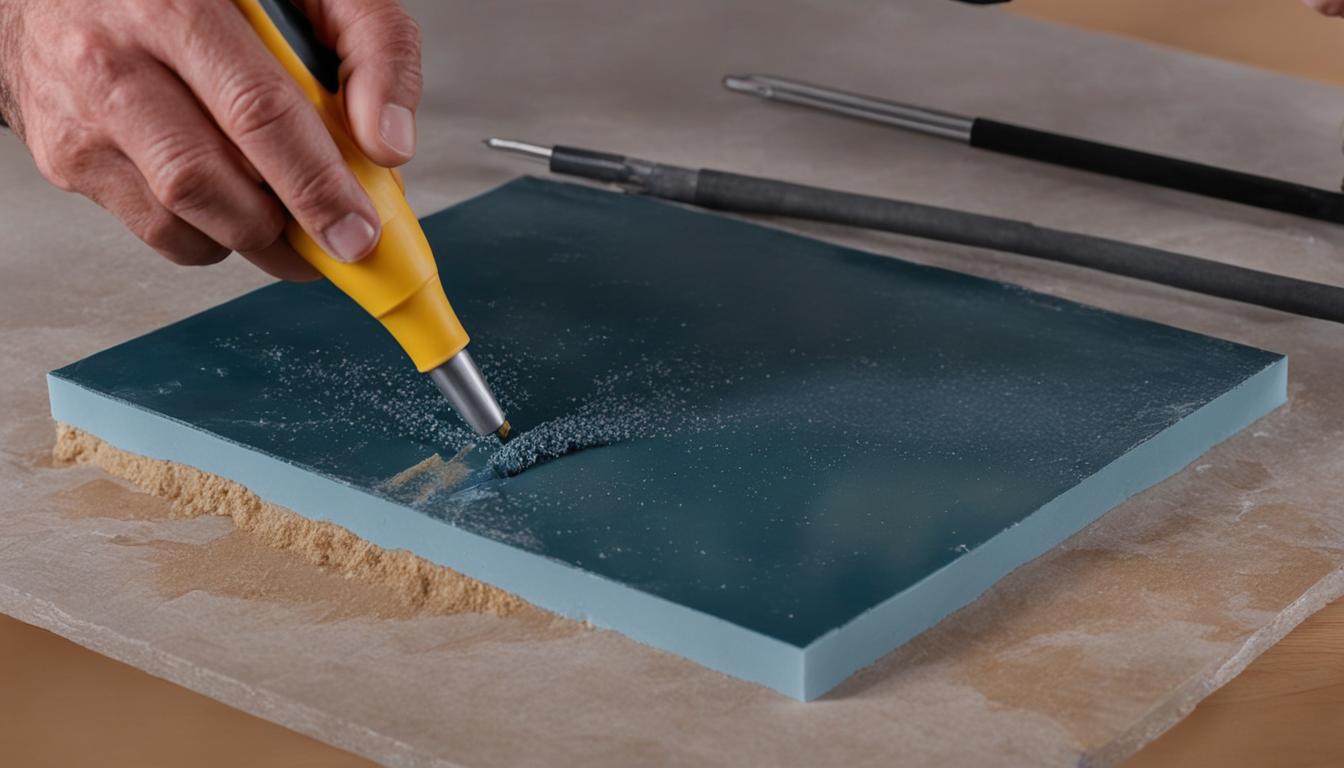
Image: Resin mold repair and restoration
Curing and Drying Time
After applying the necessary repairs and finishes, it’s crucial to allow the resin mold to cure and dry properly. This step is essential to ensure the durability of the repairs and protect against future damage.
The curing and drying time will vary depending on the materials used for the repair. Typically, epoxy resin takes 24-48 hours to fully cure, while resin putty may require up to 72 hours. Refer to the manufacturer’s instructions for specific recommendations.
During the curing and drying process, it’s important to keep the resin mold in a dry and dust-free environment. This will prevent any particles from sticking to the repairs, causing imperfections or inconsistencies in the finished product.
Once the resin mold has fully cured and dried, it’s ready to be inspected and tested for any remaining imperfections.
Inspecting and Testing the Repaired Mold
After the resin mold has fully cured and dried, it’s crucial to inspect and test the repaired areas thoroughly. This step is essential to determine if there are any remaining imperfections that need additional attention.
To inspect the repaired mold, take a close look at all the areas where repairs were made. Check for any cracks, chips, or other deformities that might still exist. Using your fingers, run them across the surface to feel if there are any bumps, rough areas, or inconsistencies.
If you find any imperfections during the inspection, it’s essential to address them promptly to avoid causing further damage. One common problem that may occur during the testing process is the mold sticking to the object during demolding. If this is the case, use a release agent to prevent it from happening again.
Final Tips for Resin Mold Troubleshooting
Here are some final tips to ensure successful DIY resin mold fixing:
- Always wear appropriate safety gear, such as gloves and safety glasses when working with resin.
- Use high-quality materials and tools to achieve the best possible results.
- Follow the manufacturer’s instructions carefully.

By following these tips and properly inspecting and testing the repaired mold, you can ensure a successful resin mold repair and restore it to its original condition.
Preventive Measures for Future Mold Maintenance
Proper maintenance is key to keeping your resin molds in top condition. By taking proactive measures, you can prevent future damage and ensure the longevity of your molds. Here are some preventive measures you can take:
Proper Cleaning Techniques
Regular cleaning of your resin molds is crucial to avoid dirt and grime buildup that can cause damage over time. Clean your molds with warm water and a mild detergent, then rinse thoroughly to remove any soap residue. Avoid using harsh chemicals or abrasive materials that can scratch the surface of the mold.
Storage Recommendations
When storing your resin molds, always ensure they are kept in a cool and dry place, away from direct sunlight and extreme temperatures. It’s recommended to store molds in a sturdy plastic container or airtight bag to prevent dust and moisture buildup.
Handling Techniques
When handling your resin molds, be gentle and avoid applying excessive force that can cause cracks or other damage. It’s also essential to use proper tools and equipment, such as brushes and mixing cups, to avoid scratches or other surface imperfections.
“Taking preventative measures is always better than dealing with the consequences of damage. By following these tips, you can ensure your resin molds remain in top condition for years to come.”
Follow these preventive measures to keep your resin molds looking perfect and avoid costly repairs in the future.
Professional Mold Repair Services
If you’re not comfortable undertaking the resin mold repair on your own, it’s best to hire a professional mold repair service. Fixmold Miami is highly recommended by previous customers and is the highest-rated company in Florida for mold remediation, prevention, and assessments.
Contact Fixmold at 305-465-6653 for expert assistance in fixing cracked resin molds. With their expertise, you can rest assured that your mold will be repaired using the most advanced and effective techniques.
Additional Tips and Tricks
To achieve professional-level results in fixing resin molds, it’s always helpful to have some extra tips and tricks up your sleeve. Here are some expert recommendations to take your resin mold repair skills to the next level:
1. Avoid Overfilling
When filling cracks or chips in resin molds, it’s crucial not to overfill them. Too much epoxy resin or putty can lead to uneven surfaces and cause further damage to the mold. To ensure a seamless repair, add the filling material in small increments and let it cure properly before adding more.
2. Use Protective Gear
Resin materials can be harmful if they come into contact with your skin or eyes. When undertaking a resin mold repair, it’s essential to wear protective gear, such as gloves, goggles, and a face mask, to prevent any health hazards.
3. Sand Evenly
Sanding is a critical step in achieving a smooth surface on resin molds. To ensure an even surface, sand in a circular motion and distribute the pressure evenly. Use a finer grit of sandpaper with each subsequent sanding, as this will eliminate scratches and further smooth the surface.
4. Consider Mold Release
Mold release is a substance that helps to prevent resin from adhering to the mold. When making a new resin mold, consider using a mold release product to make future repairs quicker and easier.
5. Use a Blow Dryer
When working with epoxy resin or putty, using a blow dryer on a low setting can help to accelerate the curing process. This can be especially useful if you’re working on a large or complicated repair, as it can speed up the process and reduce the overall repair time.
By following these tips and tricks, you can elevate your resin mold repair skills and achieve professional-level results. Remember to always prioritize safety and take your time during the repair process to ensure a successful outcome.
Exploring Advanced Mold Repair Techniques
Fixing cracked resin molds may require advanced techniques to solve the problem. In this section, we will provide some complex, yet effective repair methods.
Reshaping the Mold
If you have a warped or distorted mold, it’s essential to reshape it before repairing. You can use a heat gun or a hot air gun to soften the resin and reshape it. Then, you can use cold water to cool and harden the resin.
Alternatively, you can try the “oven method.” Heat your oven to 175°F and leave the mold inside until it softens. Carefully remove the mold from the oven, reshape it, and allow it to cool down.
Advanced Filling Techniques
For cracks or chips that are too large for regular filling techniques, you can try using a vacuum chamber. The vacuum chamber will remove any air bubbles within the crack and ensure a more seamless repair. Another approach is to use fiberglass cloth and epoxy resin. Cut the fabric to the size of the crack, apply some resin, and press it onto the mold. Repeat the process until the fabric is fully soaked and adhered to the mold.
Advanced Mold Repair Techniques Comparison
| Technique | Pros | Cons |
|---|---|---|
| Heat Gun Method | – Quick and efficient – No additional materials required |
– Requires precision and patience – High risk of damaging the mold if overheated |
| Oven Method | – Works well with larger molds – Evenly distributes heat |
– Requires accurate temperature tracking – Long curing time |
| Vacuum Chamber | – Ensures a more seamless repair – Can be used on larger cracks |
– Expensive equipment – Requires additional expertise |
| Fiberglass Cloth and Epoxy Resin | – Strong and durable repair – Can be used on larger cracks |
– Requires additional materials – A more time-consuming process |
By exploring advanced repair techniques, you can tackle even the most complex problems with your resin molds. Keep in mind that these methods require additional skills and tools than those for basic repairs. If you don’t feel comfortable using these techniques, it’s always a good idea to contact a professional mold repair service like Fixmold Miami at 305-465-6653 for reliable help.
Conclusion
Repairing resin molds can seem daunting, but with the right tips and techniques, it can be a straightforward process. Remember to assess the damage, gather the necessary tools and materials, and follow the step-by-step process for effective repairs. By taking proactive measures, you can maintain the longevity of your molds and avoid future problems.
If you’re not comfortable with DIY repairs, consider seeking the help of a professional mold repair service. Fixmold Miami is Florida’s leading company for mold remediation, assessments, and prevention. Contact Fixmold at 305-465-6653 for expert assistance.
For those looking to expand their skillset, advanced techniques can help tackle complex resin mold problems. With the insights shared in this article, you can achieve professional-level repairs and ensure your molds stay in top condition.
Thank you for reading our tips and tricks on how to fix a resin mold effectively. We hope this guide has been valuable and informative for you.
FAQ
What are some common problems that can occur with resin molds?
Resin molds can develop surface imperfections, cracks, chips, and structural issues.
How do I assess the damage to my resin mold?
Inspect the mold for cracks, deformities, or any signs of damage that need to be addressed during the repair process.
What tools and materials do I need to fix a resin mold?
You’ll need epoxy resin, sandpaper, brushes, and other essential tools and materials for a successful repair job.
How do I prepare a resin mold for repair?
Clean the mold, remove debris, and ensure a smooth surface for the repair process.
How can I fill cracks and chips in a resin mold?
You can use epoxy resin or resin putty to fill cracks and chips. Follow specific techniques for seamless repairs.
How do I sand and smooth the surface of a resin mold after repairs?
Follow proper sanding techniques and use the appropriate grits of sandpaper to achieve a flawless finish.
How do I repair structural damage in a resin mold?
Reshape and reinforce the mold to restore its original form and functionality.
How can I apply a protective finish to a repaired resin mold?
Options include sealing with epoxy resin or using a clear spray lacquer for long-lasting durability.
What is the recommended curing and drying time for repaired resin molds?
Allow the mold to cure and dry according to the directions based on the materials used.
How can I inspect and test a repaired resin mold?
Thoroughly inspect the repaired areas for any remaining imperfections and ensure the mold is ready for use.
What preventive measures can I take to maintain my resin mold?
Follow proper cleaning techniques and storage recommendations to prevent future damage.
Is there a professional mold repair service available?
Yes, Fixmold Miami, Florida’s trusted company for mold remediation, prevention, and assessments, can provide expert assistance at 305-465-6653.
Are there any additional tips and tricks for fixing resin molds?
Yes, we will share additional insights to elevate your resin mold repair skills and achieve professional-level results.
Can I learn advanced mold repair techniques?
Yes, we will explore advanced techniques for tackling complex resin mold problems, including advanced filling methods and reshaping.